As passionate pickleball players continuously seek an edge on the court, fine-tuning equipment becomes a crucial step in optimizing performance. While selecting the right paddle provides a strong foundation, customizing that paddle can unlock a new level of control, power, and stability tailored precisely to your unique playing style. The video above introduces one of the most effective and widely adopted methods for achieving this significant upgrade: strategically applying lead tape to your pickleball paddle.
Indeed, top-tier athletes in both pickleball and tennis often employ lead tape to enhance their rackets and paddles, demonstrating its proven benefits in competitive play. Understanding the science and practical application behind this technique allows intermediate players to emulate professional-level equipment customization. This targeted approach transforms a standard paddle into a finely tuned instrument, directly addressing common player desires for more power, a larger sweet spot, and improved stability during intense rallies.
Why Customize Your Pickleball Paddle with Lead Tape?
Adding lead tape to your pickleball paddle is not merely a trend; it is a calculated modification that significantly alters the paddle’s playing characteristics. This subtle addition of weight can profoundly influence several key performance metrics, making a noticeable difference in your game. Players often seek this customization to gain a competitive advantage or simply to make their existing paddle feel more responsive and powerful.
The primary motivations for using lead tape include enhancing shot power, expanding the paddle’s sweet spot, and increasing overall paddle stability upon ball contact. Each of these benefits contributes to a more consistent and impactful game, empowering players to execute shots with greater confidence. Moreover, customizing your paddle allows for a truly personalized experience, ensuring the equipment complements your individual strengths and helps mitigate any weaknesses.
Unlocking More Power and an Enlarged Sweet Spot
One of the most immediate and desirable effects of adding lead tape is the potential for increased shot power, particularly on drives and serves. By strategically placing weight, you can increase the paddle’s “swingweight,” which is a measure of how heavy the paddle feels when you swing it. A higher swingweight typically translates to more kinetic energy transferred to the ball, resulting in faster and more aggressive shots.
Furthermore, lead tape significantly contributes to a larger sweet spot, which is the optimal area on the paddle face for striking the ball. When weight is added to the edges, it increases the paddle’s moment of inertia, also known as “twistweight.” This enhanced twistweight means the paddle is more resistant to twisting upon off-center impacts, thereby making a larger area feel consistent and powerful. Consequently, even shots hit slightly outside the traditional sweet spot will maintain more power and direction, reducing unforced errors and boosting confidence.
Enhancing Stability and Reducing Vibration
Beyond power and sweet spot expansion, lead tape dramatically improves paddle stability. When a ball strikes an unweighted paddle, especially off-center, the paddle can twist in your hand, leading to a loss of control and an uncomfortable feel. However, by increasing the paddle’s overall mass and distributing it effectively, lead tape helps stabilize the paddle face through impact.
This increased stability reduces unwanted vibrations and twisting, offering a much more solid feel on every shot. Players will experience better control and accuracy, particularly when returning powerful shots or hitting volleys at the net. A stable paddle allows for more consistent shot placement and reduces strain on the wrist and arm, which can be beneficial during long matches or for players prone to arm fatigue.
Understanding Lead Tape Placement and Its Effects
The location where you apply lead tape is just as crucial as the amount you use, as different placements yield distinct performance characteristics. The video briefly touches on the most common starting point for lead tape application, describing it as “right here and here,” implying the sides of the paddle head. This basic application method serves as an excellent foundation for those new to paddle customization.
However, players can experiment with various configurations to achieve specific outcomes, adapting their paddle to suit their playing preferences. Each placement subtly shifts the paddle’s balance point and weight distribution, ultimately altering how the paddle feels and performs during gameplay. Understanding these nuances is key to effective customization.
The Foundational Approach: Sides and Top Edges
As demonstrated in the video, applying lead tape to the side edges and potentially the very top edge of the pickleball paddle is considered the “bare minimum” for noticeable improvements. Typically, this involves placing lead tape at the 3 o’clock and 9 o’clock positions, sometimes extending around to the 12 o’clock position. This strategic placement directly addresses the desire for a bigger sweet spot and more power without severely impacting hand speed.
When you add weight to these outer perimeter areas, you increase the paddle’s swingweight and twistweight most efficiently. This means your paddle gains substantial resistance to twisting on off-center hits, significantly enlarging the functional sweet spot. Consequently, players often find their drives feel heavier and more penetrating, while volleys become more stable and precise, even when not struck perfectly in the center.
Impact on Swing Speed and Hand Maneuverability
While adding weight enhances power and stability, it inevitably impacts the paddle’s overall feel and maneuverability. Increasing the paddle’s swingweight, particularly towards the head, can make the paddle feel heavier and potentially slower to react at the net. However, the initial placement discussed in the video, primarily on the sides, is designed to minimize this reduction in hand speed while maximizing power and sweet spot benefits.
Every player possesses a unique preferred balance between power and quickness. Some players prioritize blistering power and are willing to sacrifice a fraction of hand speed, while others, particularly those who play a fast, agile game at the kitchen line, prioritize quick reactions. Careful experimentation with lead tape allows you to find this optimal balance, ensuring your paddle feels powerful yet remains maneuverable enough for rapid exchanges.
Beyond the Basics: Advanced Lead Tape Applications
While the initial lead tape placement focuses on the sides and top for a balanced boost in power and sweet spot, more advanced players and those seeking very specific adjustments can explore other application points. These alternative placements target different aspects of paddle performance, allowing for a highly specialized customization process. Exploring these options can fine-tune your paddle to an even greater degree, catering to nuanced playing styles.
Experimenting with these advanced techniques requires patience and a systematic approach, as even small adjustments can lead to significant changes in feel and performance. However, for dedicated players, the ability to sculpt their paddle’s characteristics precisely can provide a distinct competitive advantage. It transforms a generic piece of equipment into a personalized extension of the player’s arm.
Adding Weight to the Throat or Handle Area
Placing lead tape closer to the handle, specifically in the paddle’s throat area or even underneath the grip, creates a different effect compared to adding weight to the paddle head. This type of customization aims to shift the paddle’s balance point closer to the hand, making the paddle feel lighter and quicker through the air. By reducing the perceived swingweight, players might experience increased hand speed, crucial for quick volleys and lightning-fast reactions at the net.
Despite reducing the overall swingweight, adding mass near the handle can still contribute to overall paddle stability and a more solid feel. It provides a counterbalancing effect, which can make the paddle feel less “head-heavy” and more controlled for certain players. This configuration is often favored by those who prioritize quickness and feel over raw power, or by players using a very head-heavy paddle who wish to bring the balance point back towards the hand.
Applying Lead Tape to the Bottom Edge (6 O’clock Position)
While less common as a primary placement, adding lead tape to the very bottom edge of the paddle, around the 6 o’clock position, can also offer unique benefits. This placement further enhances the paddle’s twistweight, particularly on shots hit low on the paddle face. It provides additional stability for groundstrokes and defensive shots, ensuring the paddle remains stable even on impacts close to the bottom perimeter.
For players who frequently hit slices, dinks, or defensive blocks that often make contact lower on the paddle, this application can provide a noticeable increase in consistency. It helps to keep the paddle face steady through impact, preventing it from rotating and leading to more predictable ball flight. However, care must be taken not to add too much weight here, as it can sometimes make the paddle feel less “lively” or reduce its power potential.
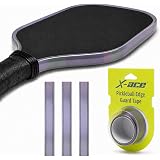
Choosing the Right Lead Tape and Application Techniques
Successfully customizing your pickleball paddle begins with selecting the appropriate lead tape and employing proper application methods. Various types of lead tape are available, differing in weight per inch and adhesive quality, making the choice important for both performance and durability. Using the correct tools and a methodical approach ensures that your customization is both effective and long-lasting.
Remember, paddle customization is a process of iterative refinement. It requires careful application, thorough testing, and a willingness to adjust based on real-world playing experience. Approaching this task with precision and patience will yield the best results, allowing you to truly optimize your paddle’s performance characteristics.
Selecting the Right Type of Lead Tape
Lead tape is typically sold in rolls, often in specific widths and weights, such as 1/4 inch or 1/2 inch wide, with varying densities. Common options include 1/4 inch tape weighing 1 gram per 4 inches, or a heavier version at 2 grams per 4 inches. Choosing the narrower tape allows for more precise application in smaller areas, while wider tape can cover more surface area quickly.
Most lead tapes come with a strong adhesive backing designed to stick firmly to the paddle edge. However, some players prefer to add a layer of clear protective tape over the lead tape to secure it further and prevent it from peeling during intense play. This extra step provides peace of mind and ensures the customization remains intact over many sessions.
Step-by-Step Application for Optimal Results
- **Clean the Paddle Edge:** Before applying any tape, thoroughly clean the paddle edges with an alcohol wipe to remove dirt, oil, and grime. A clean surface ensures maximum adhesion for the lead tape.
- **Measure and Cut:** Determine the length of lead tape needed for your desired placement. Start with small, manageable strips, perhaps 2-4 inches long, to allow for incremental adjustments. It is always easier to add more weight than to remove it.
- **Apply Evenly:** Carefully peel off the backing and apply the lead tape smoothly along the paddle edge. Avoid wrinkles or overlaps, as these can create inconsistencies and peel over time. Use firm, even pressure to ensure a secure bond.
- **Test and Adjust:** After applying a small amount of tape, take your paddle to the court and hit some balls. Pay close attention to how the paddle feels, its power, control, and maneuverability. Make note of any changes, positive or negative, then incrementally add or remove tape as needed. This trial-and-error approach is essential for finding your perfect setup.
- **Secure the Tape:** Once you are satisfied with the customization, consider applying a thin layer of clear protective tape (like electrical tape or transparent edge guard tape) over the lead tape. This protects the lead tape from abrasion, helps prevent it from peeling, and maintains a clean aesthetic.
Common Mistakes to Avoid When Adding Lead Tape
While paddle customization with lead tape offers incredible benefits, several common pitfalls can lead to less-than-ideal results. Being aware of these mistakes allows players to approach the process more effectively, ensuring their modifications genuinely enhance their game. A methodical and patient approach is always more successful than rushed, haphazard alterations.
Avoiding these errors will save you time and frustration, helping you achieve your desired paddle performance without unintended consequences. Remember that successful customization is often a process of subtle changes, not drastic overhauls, ensuring the paddle remains balanced and playable.
Adding Too Much Weight Too Quickly
One of the most frequent mistakes is applying too much lead tape in one go, significantly altering the paddle’s weight and balance. This can make the paddle feel excessively heavy, sluggish, and difficult to maneuver, especially at the net where quick reflexes are paramount. Instead, start with small amounts, typically 2-4 inches of tape at a time, and test the paddle extensively before adding more.
This incremental approach allows your body to adjust to the subtle changes and helps you pinpoint the exact amount of weight that feels right for your game. Over-weighting a paddle can lead to arm fatigue and a loss of control, negating any potential benefits in power or stability.
Uneven Application and Imbalanced Weight Distribution
Applying lead tape unevenly or in an unbalanced manner can detrimentally affect paddle performance. For instance, if you add significantly more weight to one side of the paddle than the other, it can cause the paddle to feel lopsided and difficult to control. This imbalance can lead to inconsistent ball striking and make accurate shot placement challenging.
Always strive for symmetrical application, especially when targeting improved stability and an enlarged sweet spot. If you add weight to the 3 o’clock position, ensure you add an equal amount to the 9 o’clock position. Maintain balance unless you are deliberately trying to achieve an asymmetrical effect for a very specific and rare playing preference.
Neglecting Thorough Testing
Applying lead tape without extensively testing the paddle’s performance on the court is another common oversight. The true impact of lead tape modifications can only be assessed during actual gameplay, hitting various shots under different conditions. Simply swinging the paddle in your living room will not provide enough feedback to determine the effectiveness of your changes.
Dedicate a full session, or even multiple sessions, to testing your modified paddle. Pay attention to your drives, dinks, volleys, and serves. Does it feel more powerful? Is the sweet spot larger? Has your hand speed been compromised? Continuous testing allows for informed adjustments, guiding you toward the optimal setup for your individual needs.
The Competitive Edge for Intermediate and Advanced Players
The pursuit of excellence in pickleball often involves exploring every avenue for improvement, and paddle customization with lead tape offers a tangible advantage. As the video highlighted, even world number one players leverage such modifications to fine-tune their equipment, demonstrating the critical role it plays at the highest levels of competition. For intermediate and advanced players, this customization represents a significant step in elevating their game beyond standard factory specifications.
By understanding and applying lead tape effectively, you transform your pickleball paddle into a specialized tool designed specifically for your style, enhancing your power, control, and confidence on the court. Embrace the journey of experimentation to discover the perfect balance that will truly unleash your potential. Customizing your pickleball paddle with lead tape is a nuanced art, but one that promises substantial rewards for those committed to refining their play.
Weighing In: Your Pickleball Paddle Lead Customization Q&A
What is lead tape for pickleball paddles?
Lead tape is a weighted, adhesive strip used to customize a pickleball paddle by adding weight. It’s a common method used by players to optimize their equipment for better performance.
Why would I want to put lead tape on my pickleball paddle?
Adding lead tape can help increase your shot power, create a larger ‘sweet spot’ for more consistent hits, and make your paddle feel more stable upon ball contact.
Where should I start applying lead tape if I’m new to customization?
For beginners, a common starting point is to apply lead tape to the side edges of the paddle, typically at the 3 o’clock and 9 o’clock positions, and sometimes around the very top edge (12 o’clock).
Can adding lead tape negatively affect my paddle’s feel?
Yes, adding too much weight, especially too quickly, can make your paddle feel heavier and potentially slower to swing. It’s important to add lead tape gradually and test your paddle often.